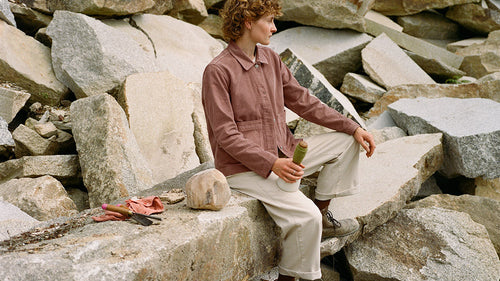
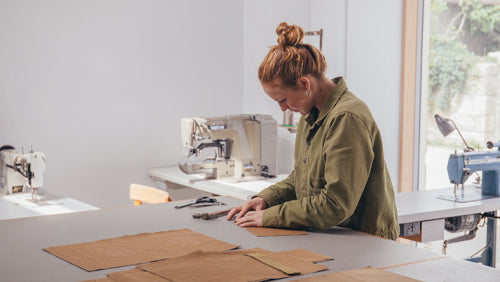
Back in April 2019, we needed photos. We'd taken everything we'd ever shared on an iPhone, documenting the creative process behind our remaking of iconic jackets. But then, our final product was ready, and now we needed to share it with the World. We needed photographs that did our jackets justice, and we wanted to tell the wider story in a fun and interesting way.
As a small business, resources were tight, and we didn't have the funds to rent a studio, professional models, buy expensive camera kit, or hire production, lighting etc.
Constraints make you interesting.
With the help of our friend and photographer Dan Rubin, who we commissioned for Batch No.1, we used only iPhones and Moment lenses to shoot every photo we needed for our website in a single day.
...
We've put together this guide to share everything we learnt doing an entire photoshoot only using iPhones. We hope you find it useful, or at least, an interesting read.
...
The gear we used:
Dan’s camera: iPhone 8 Plus w/Moment Case
Becky and Huw’s cameras: iPhone X w/Moment Battery Cases
Apps for capture: Moment camera app (RAW capture and anamorphic lens), Apple’s default Camera (mostly for Burst Mode), Focos (for simulated shallow depth of field)
Moment lenses: Tele (v2), Anamorphic
Battery packs: Anker (various models)
Tip 1: Create a Mood Board

As soon as you have an idea for your brand you should create a mood board that represents your brands’ personality - basically the vibe you want to give off.
The images on your mood board should inspire your brand and how you want people to perceive you. From looking at your mood board you should be able to see whether your brand is clean and minimal, colourful and fun or young or old etc. It will also help you find ideas for the types of locations you’ll want to use for the shoot, the poses you want your models to do, and your final editing style.
A good tool for storing images that inspire your brand is Pinterest — save images that inspire you from Pinterest as well as uploading your own shots to private boards. Once you have a bunch of images saved, you can create your mood board using Keynote or Powerpoint.
Now that you know the vibe you're going for in your shoot, it’s time to start planning how you’re going to achieve it.
Note: The mood board is never finished. You’ll continue to add to it as you find photos that inspire your brand over time. You should also share this mood board with anyone who will be on the shoot with you so they know what you’re aiming for — if you’re working with a photographer like we were, rather than shooting it yourself, involve them in the creation of the moodboard so their experience can help shape the style.
Tip 2: Decide what type of shots you need

Now that you know the vibe you want, you now need to look at what specific shots you’ll need for your website and for social content.
A good place to start would be identifying why you need the photos:
Once you know where you’ll be using the photos, make a list of the must-have images. For example, on product pages, you’ll likely want product shots, detail shots, shots of your product being used, etc. How many products will you be shooting? You need to make sure you get the essential photos of each product.
Make a checklist of the essential shots you’ll need to make sure you get them all on the day of the shoot. The more organised you are here, the more fun you can have shooting the rest of your lifestyle shots.
Once you have listed all of the essentials, list the nice-to-haves. These will be your lifestyle shots, landscape shots, and b-roll shots which are less product focused but give people a sense of your brand. Think of these as photos you want to get but will curate after the shoot, rather than checking specific shots off a list.
Tip 3: Plan your shoot

Another planning step? Yup. When you don’t have much time or budget, planning makes sure you get everything you need out of your shoot so you can enjoy the day.
Some things to consider in your planning:
Make sure your plan contains all the details to make the day runs well, including a pre-shoot shopping list, tool-kit, and everyone’s clothing sizes and allergies so you can plan outfits and meals in advance. If you don’t have a producer on the project, that means it’s you!
Tip 4: Shooting flat shots

You’ll want to shoot your flat shots before doing any other photos to make sure that your product is a clean and looks it’s best. Print out a checklist of every shot/angle/detail you’ll need to shoot so you can work through them quickly.
Some tools you’ll need to do this are: Background paper (we chose a plain white background), box lights (you can grab those cheaply on Amazon), and if you’re shooting clothing, one of these (sticky rollers) will be a dream.
When you’re shooting flat shots on your phone, use the Moment app to control the white balance. If you know the strength of your lights, most lights will state their colour temperature — match this white balance of the lights with the phone. This will make sure that the colour of the product in your images is consistent across all flat shots. Use the Moment tele lens to shoot close-ups to capture product details.
Give yourself a few hours to do these shots. It will take longer than you think.
Tip 5: Shooting Essential and Lifestyle Images

This is the fun part. The key thing to remember for these types of shots is that they require a mixture of direction from the photographer, and documentary-style shooting to capture things as they happen.
Essential shots
For the essential shots, it’s best to plan ahead and create a system, especially for similar images across your products. When we were shooting the jackets, we spent a few minutes taking test shots to make sure the light and background worked as we imagined, and then used the shots of the first jacket as the template for the rest, comparing those shots as we worked through the list on each jacket (four colours) and model (male/female) to make sure the shots were consistent.

We also planned the time of day carefully for these, as we were using natural light and needed them all to have the same, even lighting. To achieve this, we picked a location that would be in shadow a few hours before sunset, but still with plenty of light naturally bouncing into the space — not too dark, not too bright, and no harsh shadows. This also ensured the white balance would be as consistent as possible across this set of images.
"Having the shot list helped immensely, as did working as a team: Huw was in charge of the list and ensuring we got each shot before we moved on to the next jacket colour, Becky was in charge of styling, which meant I could focus on the shots and keeping the pace moving so we didn’t fall behind schedule. Assigning roles before the shoot helps everything work as smoothly as possible, especially with time constraints." Dan Rubin
Lifestyle

The lifestyle setups required a good deal of planning, including art direction and set design/construction with friend and set designer Dewi. We also only had a single day to shoot 7 specific setups plus sunrise/sunset contextual scenes and a few transitional setups, thankfully all on the same location. This meant scouting the location for each setup prior to the shoot day to decide on the best time of day for each location, then planning the timings for each setup, time between setups for getting into position, checking the jackets, styling models and meals / breaks etc.
The night before the shoot, we sat down with our host, Dewi (also one of our models, and our set designer), and walked through the entire schedule for each location around his farm. He'd already planned the set ups at each location (we'd visited the farm a lot, and spoke to Dewi often in the weeks leading up to the shoot). Having a final walk through allowed us all to plan the order of the day and confirm our timings. That made sense for transporting the entire crew and any props between setups, as well as making sure the natural sunlight suited the locations throughout the day.

"As a photographer, all this planning allowed me to pre-visualize as many of the in-between opportunities as possible — the non-planned moments that I knew would occur as we moved setups, and moments I knew I could direct in order to create an environment for serendipity. On the day of the shoot, it was my responsibility to keep everything moving, and watch the clock as well as the light. There were no time for do-overs, so constant communication between Becky, Huw, and me was essential for getting every shot on our list at each location, while also looking out for unplanned moments and any amazing light we could take advantage of.
Burst Mode proved invaluable for capturing moments we wouldn’t have been able to recreate — though bear in mind that any images taken with the default iOS camera won’t have a consistent white balance, nor will they be in RAW format, which will add complexity during post production. All Essential and Lifestyle shots were taken with a mixture of the Moment app, Focus app (iOS), and the default iOS camera, using the built-in lenses on the iPhone 8 Plus, and the Moment Telephoto and Anamorphic lenses." - Dan Rubin

Production pointers:
Tip 6: The edit
(Notes from the edit: A manual back up of every file name of photos we liked)
So you’ve finished your shoot — now you have to edit the photos. If you are working with a photographer to edit the images for you, we recommend spending a couple of hours together after the shoot while everything is fresh to pick which images will make it into the final cut. The aim is for you to pick images that are suitable to your brand, and you’ll know this better than any photographer. Plus it will save them hours in editing images that you will never use.
Once you’ve made your selects, look back to your mood board and pick the editing style that you’d like. Is it based on a type of film? Colour, black and white, or a mixture of both?
Finally, make sure that the colours of your product are similar to what they are in real life. Confirm what shades you should be aiming for in the edit. You don’t want images that look beautiful at the expense of your product looking completely unrealistic.

Shooting with a smartphone inevitability means you’re going to capture a lot more shots. Over the course of 1 day, between three phones, we took 7,000+ photos (including individual Burst Mode images). We had no idea how many we’d taken until the evening when we started to back everything up. That’s when we realised how much work was ahead of us to identify the shots we wanted to edit.
As a client and as a photographer, even if you’re super aligned your vision and style, you’ll still select different shots to be in your final edit. As a client, we made ourselves available the next morning to go through all the shots on one laptop, together with Dan. We had a simple system to colour tag photos we liked on the Mac, and wrote a manual list as back up in a notebook. It took us about 3-4 hours to go through all the photos and mark our initial selection. If we’d asked Dan to do this for us, we’d have missed certain shots we really wanted, and we’d have been asking Dan to do a huge amount more work to allow for extras. His to-do list was already long enough!

"I knew that editing the images for consistency would be more difficult than had I shot on a bigger digital camera, or on film — specifically because of the inability to set a single, consistent image format for every shot. If you’re able to shoot every image in a single, third party app (such as the Moment app) in RAW, and always set the white balance, the edit will be easier — however, you’ll miss out on any scenes that benefit from Burst Mode (I tend to use it for capturing fast motion, and some portraits), and anything that catches you by surprise: the fastest camera app to launch from a locked iPhone is the default iOS camera, and it’s better to have those images than miss them because you took a few extra seconds to unlock the phone and launch a 3rd-party camera app."
"Normally I prefer to edit all iPhone images using iOS apps directly on the phone — for this shoot, however, I knew the volume of images plus the need to keep the jacket colours consistent across images, setups, and lighting conditions (not to mention file formats with inconsistent white balance and dynamic range), so I copied all the selects to my MacBook Pro and used Lightroom Classic for the majority of the editing. This allowed me to create and fine-tune some presets, and apply those to a large number of images quickly. Lightroom also makes it easy to edit images to a ‘reference image’ which is especially useful for colour-matching."
The edit process involved 3 primary rounds: the first pass was to get an initial target edit in place across all the selects, normalise white balance, and flag any images which would require more work to get them to line up with other images in the same setup. Those rough edits were then sent to the client (Becky and Huw) for their feedback, including specific requests: Which images they absolutely needed for the website launch and related promotion (to prioritize the final edits, and also further reduce the number of images in the set), and which images should be used as colour targets for each jacket. This last request is imperative for product photography: Customers will use these images to decide on their purchase, so they need to be accurate to the client’s wishes and consistent across the entire set of images. Having the client’s sign-off on colour at an early stage makes the rest of the edit that much easier.
In a few specific instances, final colour correction was done in Photoshop, for example: images of the bright blue jacket that also included a lot of sky, or shots of the green jacket which included a lot of grass or trees. In those instances, I created two separate edits of each image in Lightroom: one to match the jacket colour, the other to match the rest of the image to other photos in the same setup. Both edits were then opened as layers in Photoshop, which made it easy to paint in the colour-corrected jacket using a layer mask." - Dan Rubin
...
The final set included 292 edited photos.
See them all in use on our website or our Instagram.
...
You’ll probably agree that we managed to get a lot done in a single day of shooting, hopefully these tips give you the advice you need to create brand photography of your own.
Dan blew us away with what was possible from the device we all carry around in our pockets, and we’re super grateful for the time and energy our whole team put in to make this shoot happen. Huge thanks to Dan, our set designer Dewi, our location at Combine and our models and friends Fern, George, Harry and Dewi. Bring on Shoot No.2!


